1 directory was hidden.
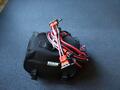
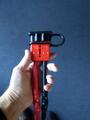
0101-12vdc-cables
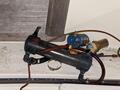
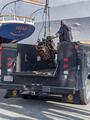
A while back I purchased a 12V air compressor which is useful for
tires and other things. I also have a compressed air tank it is
useful for filling that. The cables where short and light gauge wire,
plus you had to lift the hood to put the clamps on the battery. I put
a 175A rated quick connect on a 150A fuse reachable under the front
bumper. I made a short 175A to 50A connector and then an AWG 6 gauge
cable with 50A connectors. I had some odd 35A rated connectors from
older UPS batteries so added one to the air compressor and made a 50A
to 35A short step down cable. No excuses for underinflated tires.
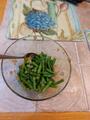
0103-crispy-bean
This was green beans fried in olive oil, sesame oil, and hot sesame
oil. It is similar to Thai crispy bean in flavor.
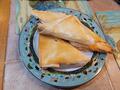
0104-samosa
This is a not entirely successful attempt at a samosa recipe that used
philo dough. The recipe called for butter but I used water to glue
the philo dough. I don't have the patience to work with philo dough
so I won't bother with this recipe again.
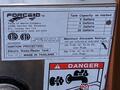
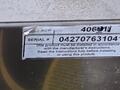
0109-force10-6gal
This is the label on Ibis water heater. It is a Force10 406011 which
is a 6 gallon 115V 1500W heater with front heat exchanger connections.
The prior owner used it only with engine heating, running the diesel
in the morning to heat water for a shower, charge batteries and freeze
the refrigerator cold plate.
This water heater has been removed and will be replaced with two 3
gallon 12V 300W water heaters, one for galley and the other for vanity
and shower. Both will be mounted in the cabin.
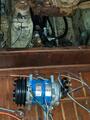
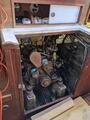
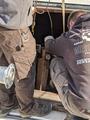
0110-ibis-refrig-out
This is a first step in removing the diesel. The engine driven
refrigeration system had to go.
Clive at Sea Frost told me the age, with the system already a
conversion from original Freon to R134A meant that it was best not to
try to salvage any of the parts and instead start over with new
components. It all went into metal recycling.
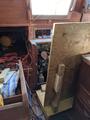
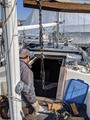
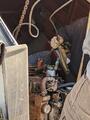
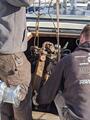
0112-ibis-work
This is a set of photos at an early point in removing the diesel
engine. The batteries had been removed and the wood frames where the
batteries were held were in pieces in the cockpit. Most of that wood
was rotting. The batteries had to be removed to remove the water
heater. The very aft parts of the exhaust were another challenge as
well as the manifold, raw water heat exchanger, and severely rusted
shaft coupling.

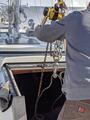
0115-ibis-work
This photo shows that the shaft coupling bolts are now out and the
shaft was disconnected from the engine.
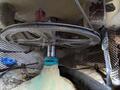
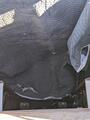
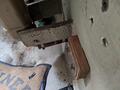
0122-ibis-cabin-protect
This set of photos show the frame made from scrap wood that was made
to protect the cabinetry and cabin sole when the engine was removed.
The last two photos show the view from the companionway before and
after putting an old moving blanket in place.

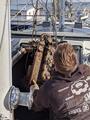
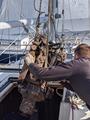
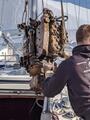
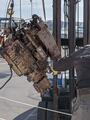
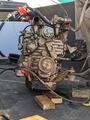
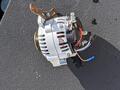
0124-ibis-engine-out
Finally the day came to remove the diesel engine from Ibis. This was
done by Lukas Smith of Diesel Smith with assistance from yard worker
Matt and Charles operating the fork lift. The diesel was later sold
to Trans Atlantic Diesel (TAD) in Virginia and offset about half the
cost of the removal. According to Lukas the alternator and regulator
were worth at least as much as the diesel so TAD might have got a good
deal. I was happy to have someone pay to take the engine off my
hands.
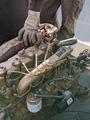
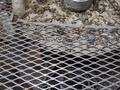
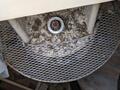
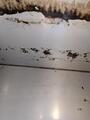
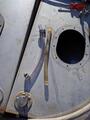
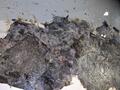
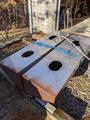
0126-ibis-tanks
Back at home a warm day (above freezing - this was January) provided
an opportunity to power wash the inside of the fresh water tanks.
Each tank had two inspection ports and a baffle to divide the tank and
reduce slosh of the 400 pounds of water in each tank when full.
A few photos were taken of the thick mat of black dead algea on the
inside walls of the tanks. It took a few hours to get all the algea
off. Part of the problem was lack of visibility when the power washer
created a fog in the tanks. It eventually came off. The tanks were
filled with water and bleach twice and flushed.

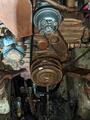
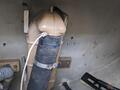
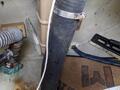
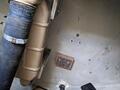
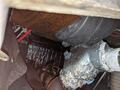
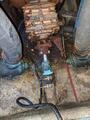
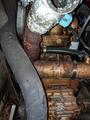
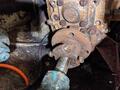
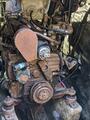
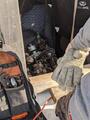
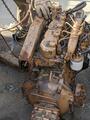
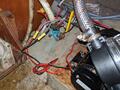
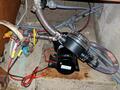
0128-ibis-guts
This is an assortment of photos after the diesel was removed. The
first is the aft exhaust piece which was inaccessible and still hadn't
been removed. The next two are the greasy engine compartment with
tangle of wires. The last two are close ups of the old fresh water
pump and the through hull used for the salt water foot pump for the
sink. The pump might be left in place as an emergency fresh water
pump should the electric pump fail while at sea.

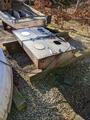
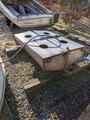
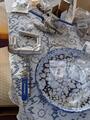
0129-ibis-plumbing
One final photo of the fresh water tanks and a photo of some of the
stainless steel parts that will be connected to the tanks in the
updated fresh water system.
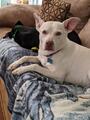
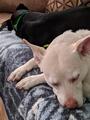
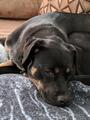
0217-tired-erin-pups
In mid February I dog sat for Erin and Mike and did a little
rototilling in their yard and garden. The is the pups after a two
hour hike. Lily managed to lift her head for a moment but Pepper was
too exhausted to bother. Tired dogs are always well behaved and that
was part of the plan. We all liked the exercise.
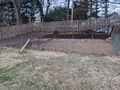
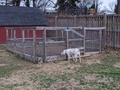
0218-erin-garden
In mid February I dog sat for Erin and Mike and did a little
rototilling. These photos are of the two gardens and area outside the
larger garden after rototilling. I think the two piles were spread
out on the large forground patch before I left. The soil is in great
shape compared to when they started these gardens.
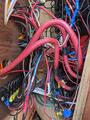
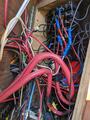
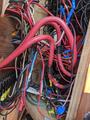
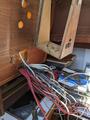
0222-ibis-rats-nest
As an semi-retired electrical engineer and former networking guy these
photos of the back of Ibis breaker panel were comical but fairly
disturbing. The rats nest of wire could only be dealt with by cutting
most of it. Wires were soldered to the back of the breaker panel.
Nearly all positive wires were red so not worth trying to figure out
which is what. This is when I decided on a complete rewire.
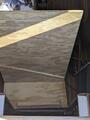
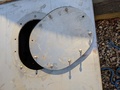
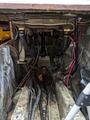
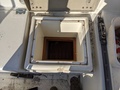
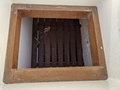
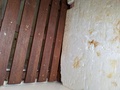
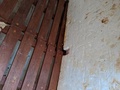
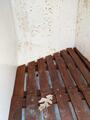
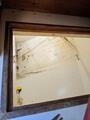
0223-ibis-ice-cavern
The ice box was way too big. It turned out to be nearly twice a big
as I thought divided by a pair of one inch foam sheets cut to fit.
The aft half was only barely accessible from a hatch in the cockpit.
The last photo is from inside the cabin looking into the ice cavern
with the teak gratings and insulating foam divider removed.
Reducing the size of the ice box is now a job for the reciprocating
saw (aka sawzall) and some fiberglass work. This will make room to
the side of the engine compartment that can house the refrigeration
system, any water maker added later, the charge controllers and the AC
charger.
0223-ibis-rats-gone
The rats have been chased out of the breaker panel rats nest. The
wires are mostly cut in this photo. Most of the wires have been
removed as they were traced from the load.
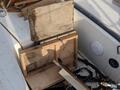
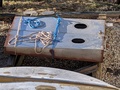
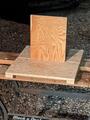
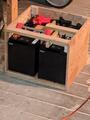
0303-battery-box
This was a first step in building a battery box prototype. The two
boards are slightly bigger than the battery with a divider in the
middle.
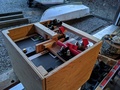
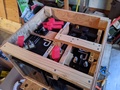
0308-battery-box
The prototype battery box finally was finished. Six of these will be
needed. The top part has a lot of small parts. Having made a
prototype I now know to build the top part first, then the divider and
bottom, then back and sides and front. The top part of the final
battery boxes will look a bit different.
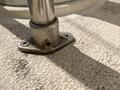
0312-binacle-guard-foot
I took this photo to try to see what type of set screw was used in the
binacle guard feet. It was an allen head. Later these feet will have
to be removed since the spacing and distance from the binnacle are
different and the new guard is 1.5 inch tube and these are 1 inch.
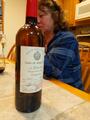
0319-special-wine
This was a bottle of really good wine that we've had for a while. We
think Chris gave this to us as a thanks for letting him use our
mooring for a week when his boat was disabled.